
In the world of generative AI, Leonardo creates ripples as a high-end image generator for easy creation. Named after the famous artist Leonardo da Vinci, this tool gives you an efficient way to turn your descriptions into striking visuals.
Why Choose Leonardo?
Leonardo stands out in terms of adaptability and simplicity. Here’s what you can expect:
• Adaptive Image Size and Style: Leonardo AI allows for adjustments in terms of size to best fit and photorealism to suit the requirements.
• Diverse Images Available: You could create multiple images for your designed product and later pick the very best one for representing your concept.
• Refining Tools: At this point, after selecting one image, it’s time for editing, changing, and fine-tuning it. Plus, you can download your masterpiece in one click.
Perfect for Creators and Designers: Leonardo AI has been crafted for those who enjoy creation with efficiency. Be it a blogger, marketer, or designer, this tool provides an instinctive way of bringing your ideas into reality with minimum effort.
How to Use Leonardo AI to Generate Stunning Images
Leonardo AI is a powerful instrument for making strikingly unique and customized visual artworks. Whether you’re going to use the free version or switch to the paid one, this guide will walk you through the process step by step.
What You Need
Free Version: According to the terms, the free version of Leonardo AI limits you to a certain amount of tokens a day that will be spent after each command.
Paid Plans: At the very start, the paid plans will be for at least $10 and will offer a long list of features with the least number of curtains possible. Commonly, the majority of users utilize the free iteration to get the ball rolling.
Step-by-Step Guide
1. Sign Up for Leonardo
Visit the Leonardo website and create an account. You can sign in via your Apple, Google, Microsoft, Mail.ru, or social media accounts.

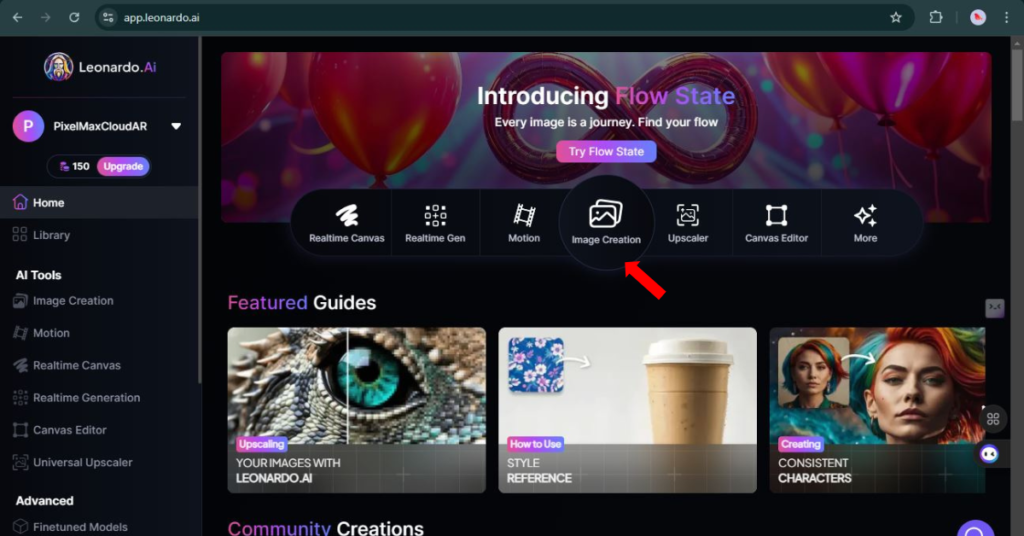
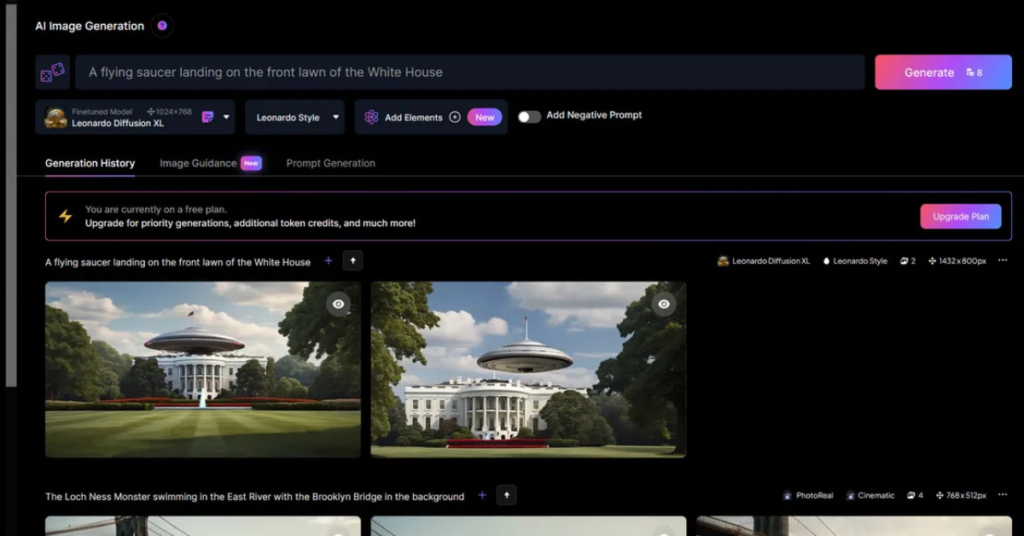
2. Access the Image Generator
Once logged in, navigate to the Image Generation section. You can locate it on the center of the menu, the left-hand side button, or simply click the Create New Image button situated at the top.
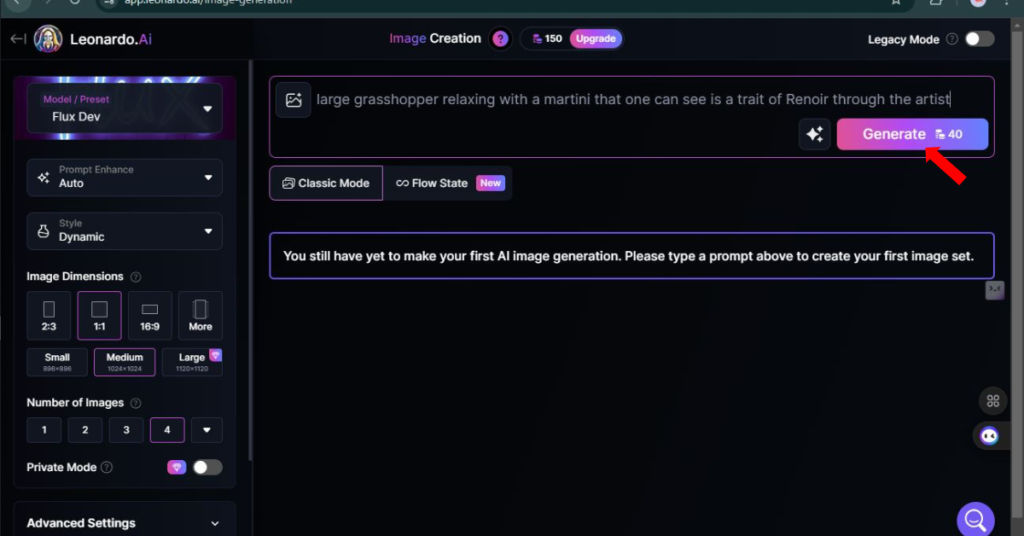
3. Create Your First Image
In the field with writings, communicate it to the box provided. Add more details as the style or the mood (e.g., large grasshopper relaxing with a martini that one can see is a trait of Renoir through the artist). Press the Generate button, and your image will be created instantly. If you are one of the ones who have chosen to use the free mode, Press the token usage first then proceed with this.
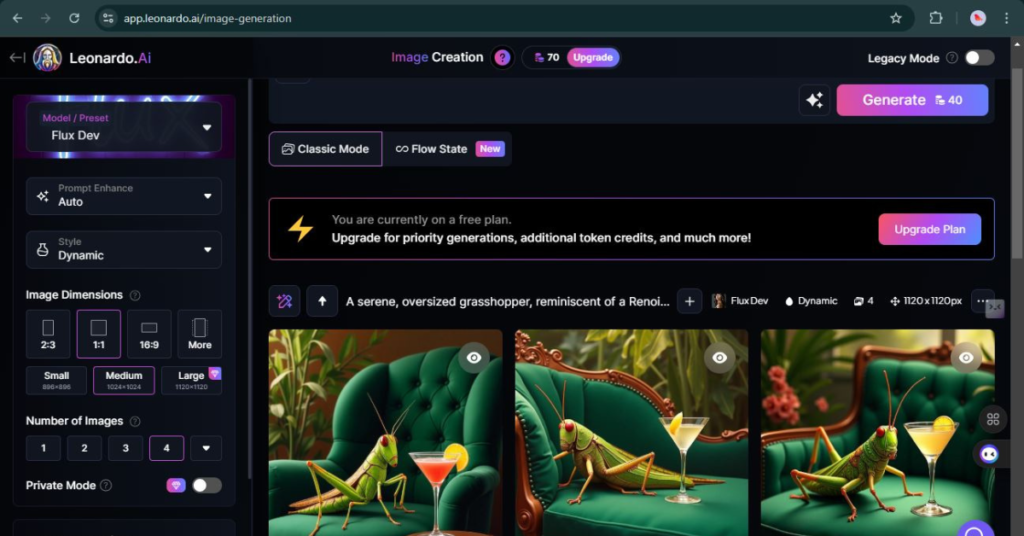
4. View and Review Your Results
There will be four amazing photographs that can be shown, and they are all designed by Leonardo. Look at them and decide your next steps.
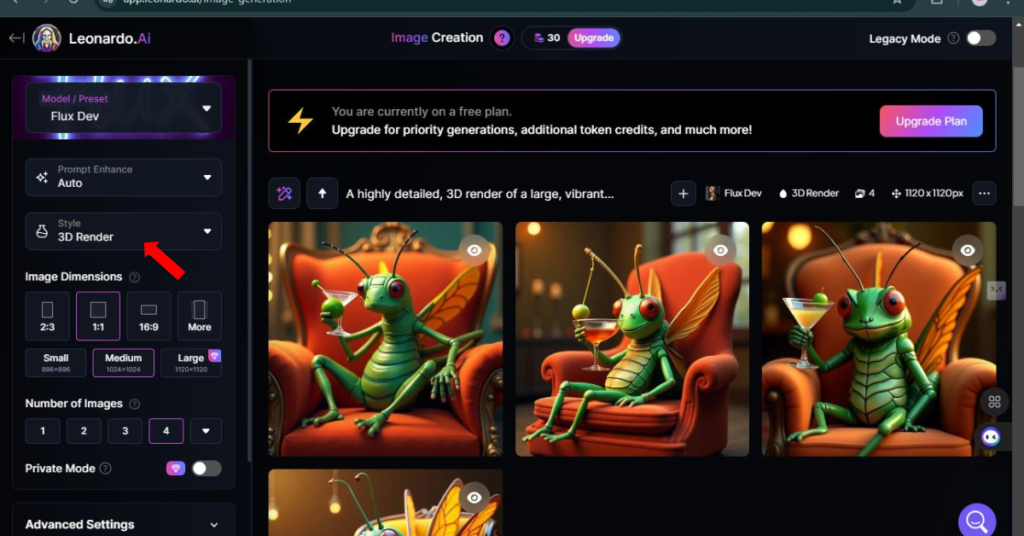
5. Choose a Model or Style
Choose the format of the output by selecting a specific model from the dropdown menu. Such formats include: – 3D Animation Style or Anime Pastel Dream. Feel free to try out new models and styles to find the one that suits you best.
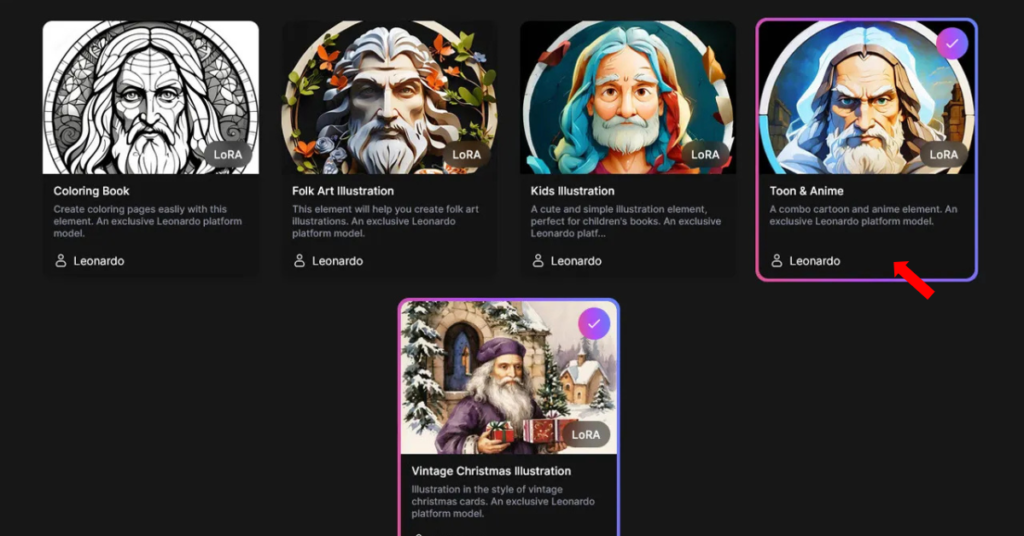
6. Add Elements
Use the Add Elements tool to bring in certain themes like Folk Art Illustration, Kids Illustration, or Vintage Christmas Illustration. The best amount of choices is 2 up to.
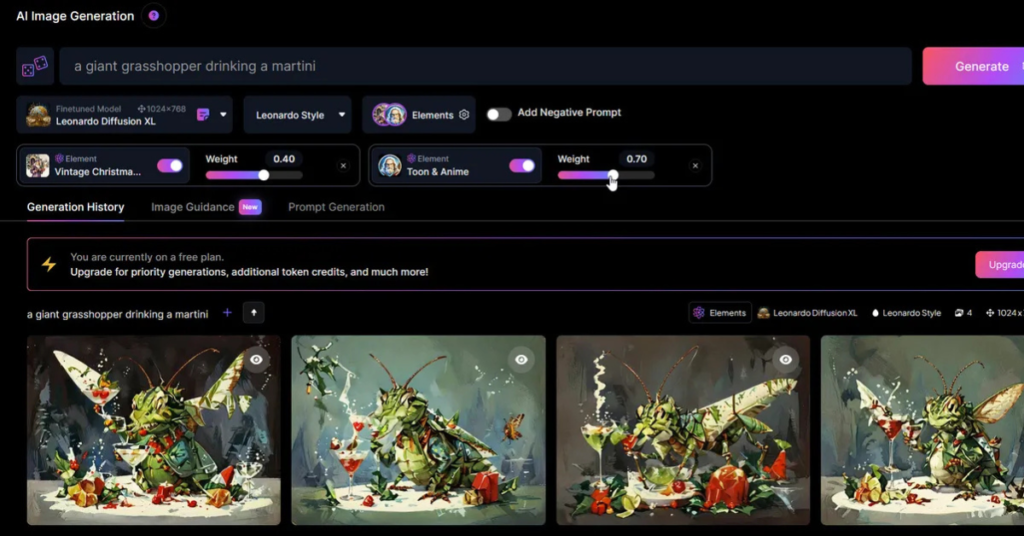
7. Refine Images with Elements Added
Now that you have added the elements, you can use the sliders to change their intensity so that they look better. Click Generate to apply these elements to your image.
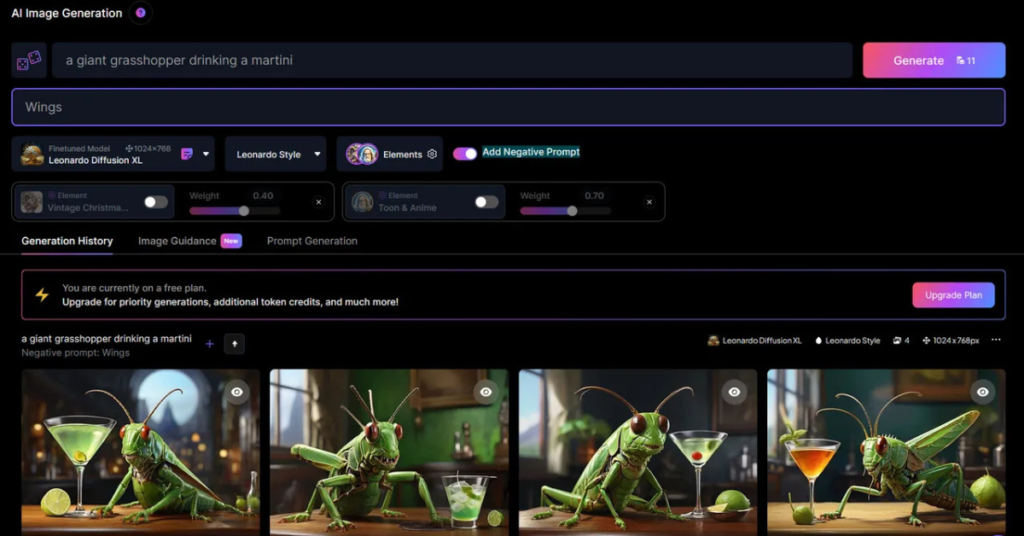
8. Negative Prompt
Write a Negative Prompt excluding what they do not want to see. Suppose you don’t want wings in your grasshopper image, write “wings” in the negative prompt and click Generate.
9. Adjust Number of Images
Understand how many images you want to see in the results. Click the top-left control and set the number of images to your liking, then click Generate.

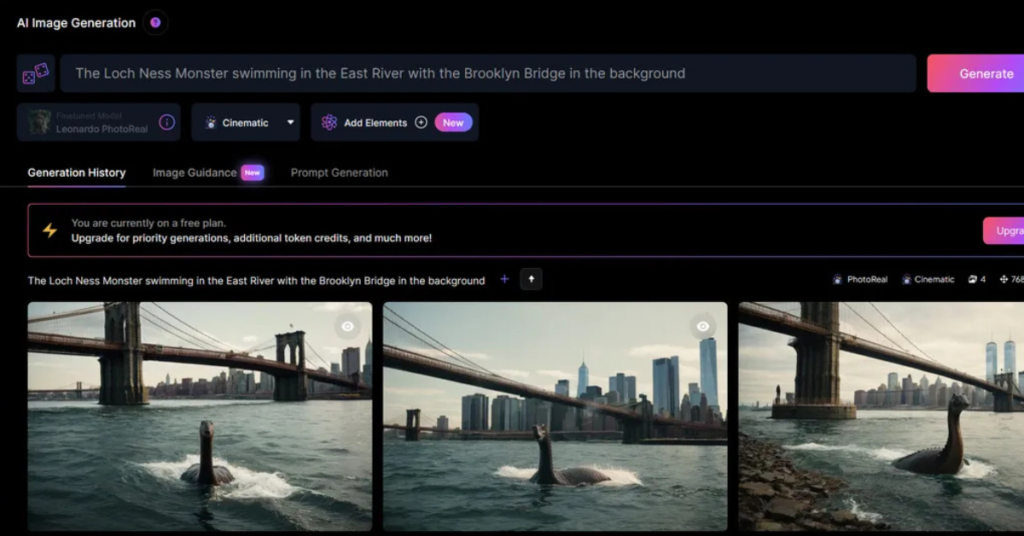
10. Generate Photorealistic Images
Activate PhotoReal for real-life images, set the depth of field to High, Medium, or Low, and enable RAW mode for highly detailed images.
11. Image Dimensions
From the Advanced Controls, select pre-set ratios such as 4:3 or 16:9, or control the height and width using the sliders.
12. Choose and Edit Your Image
Choose the generated image that you like most and edit by using the following:
- Unzoom Image: It will zoom out and show more background
- Remove Background: Completely removes the background
- Alchemy Upscale: Improve resolution choosing between Smooth or Crisp
A/B toggle to switch your image between edited and original

13. Copy or Download the Image
Once satisfied, click on Copy to Clipboard to paste somewhere else or Download Image in order to download it to your device.

Why Use Leonardo AI?
Whether it is a newcomer or a pro, Leonardo AI allows flexibility and ease with a degree of creativity. This turns into an exciting, fun process for both serious and playful imaginations, or just work-quick and quick work.